Pi4J - Adding a REST interface with Spring Boot
As I was learning Spring Boot myself, I thought the easiest way to learn was trying to build an example and write about it. So here we go… :-)
What is Pi4J?
While doing my experiments earlier with Java 11 on a Raspberry Pi, I came accross the Pi4J project which allows you to control the GPIO pins easily from Java. But because it was a bit outside the scope of my experiments I didn’t use it (yet).
As I now want to take the next steps with my Pi-experiments I got back to that Pi4J to check what I could do with Spring and REST. A Java 11 version of Pi4J (2.0) is currently in development and I started from this develop/2.0 branch with a fork and a new branch “2.0.service” on my GitHub account.
In this new branch I tried to add a REST application which enables to control the GPIO’s of a Pi from a remote PC via the browser.
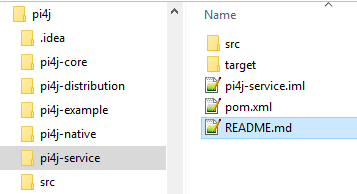
New module: pi4j-service
The clear structure of the Pi4J project into separate modules allows to easily add an extra one in which we can build the REST application.
POM
The pom.xml file is pretty easy, only a few dependencies are needed.
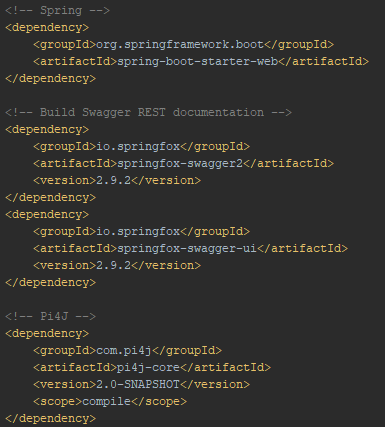
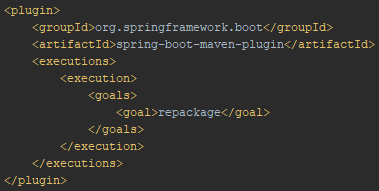
One important piece is the plugin which allows to produce a packaged jar with all dependencies so we don’t need to install any extra dependencies on the Pi.
GPIO Singleton
A Spring Singleton component is used to hold a reference to the Pi4J GpioController and a list of the provisioned pins. This is based on the documentation on https://www.pi4j.com/1.2/example/control.html.
@Component
@Scope(value = ConfigurableBeanFactory.SCOPE_SINGLETON)
public class GpioControllerSingleton {
    private Logger logger = LoggerFactory.getLogger(this.getClass());

    /**
     * The GPIO controller.
     */
    private final GpioController gpio;

    /**
     * List of the provisioned pins with the address as key.
     */
    private final Map <integer, object="">provisionedPins = new HashMap<>();

    /**
     * Constructor which initializes the {@link GpioController}.
     */
    public GpioControllerSingleton() {
        this.gpio = GpioFactory.getInstance();
    }

    ...

    public boolean provisionDigitalOutputPin(final int address, final String name) {
        if (this.provisionedPins.containsKey(address)) {
            throw new IllegalArgumentException("There is already a provisioned pin at the given address");
        }

        final GpioPinDigitalOutput provisionedPin = this.gpio.provisionDigitalOutputPin(
                this.getPinByAddress(address), name, PinState.HIGH
        );
        provisionedPin.setShutdownOptions(true, PinState.LOW);

        if (provisionedPin != null) {
            this.provisionedPins.put(address, provisionedPin);

            return true;
        }

        return false;
    }

    ...
}
Info REST
Pi4J can provide a lot of info about the Pi board. All these functions are exposed via info REST calls. This is all based on the documentation on https://pi4j.com/1.2/example/system-info.html. As an example this is a part of the code with the rest call to provide the Java information.
@RestController
@RequestMapping("info")
public class InfoRestController {
    @GetMapping(path = "java", produces = "application/json")
    public Map <string, string="">getJavaInfo() {
        Map <string, string="">map = new TreeMap<>();

        map.put("Vendor ", SystemInfo.getJavaVendor());
        map.put("VendorURL", SystemInfo.getJavaVendorUrl());
        map.put("Version", SystemInfo.getJavaVersion());
        map.put("VM", SystemInfo.getJavaVirtualMachine());
        map.put("Runtime", SystemInfo.getJavaRuntime());

        return map;
    }
}
GPIO REST
All GPIO specific code is in the GpioControllerSingleton class, so with a REST interface we can easily expose those functions.
@RestController
@RequestMapping("gpio")
public class GpioRestController implements ApplicationContextAware {
    private Logger logger = LoggerFactory.getLogger(this.getClass());

    private ApplicationContext context;

    @Override
    public void setApplicationContext(ApplicationContext applicationContext) throws BeansException {
        this.context = applicationContext;
    }

    /**
     * Provision a GPIO as digital output pin.
     *
     * @param address The address of the GPIO pin.
     * @param name The name of the GPIO pin.
     *
     * @return True if successful.
     */
    @PostMapping(path = "provision/digital/input/{address}/{name}", produces = "application/json")
    public boolean provisionDigitalInputPin(@PathVariable("address")  int address, @PathVariable("name")  String name) {
        return this.context.getBean(GpioControllerSingleton.class).provisionDigitalInputPin(address, name);
    }

    ...
}
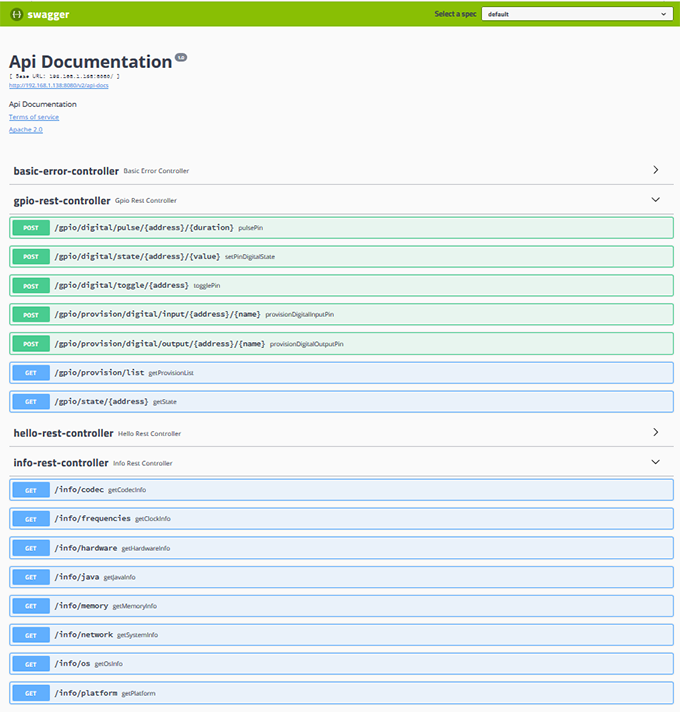
Swagger
Because we added the Swagger dependencies in the POM file we get a documentated web interface “for free”. We only need to add a Swagger configuration to the application once to document all REST interfaces.
@Configuration
@EnableSwagger2
public class SwaggerConfig {
    @Bean
    public Docket api() {
        return new Docket(DocumentationType.SWAGGER_2)
                .select()
                .apis(RequestHandlerSelectors.any())
                .paths(PathSelectors.any())
                .build();
    }
}
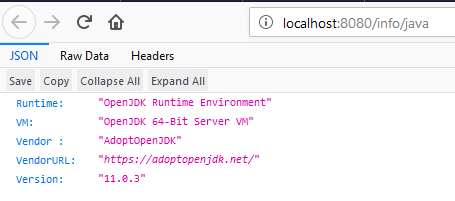
Running on PC
We can run the Spring application from within our IDE on the PC we are working on and some of the info REST calls even work. For instance, this is the Java info om my machine.
Running on Raspberry Pi
Installations
As the current 2-branch doesn’t break functionality, we can still use the installation description from https://www.pi4j.com/1.2/install.html with
curl -sSL https://pi4j.com/install | sudo bash
I’m using the same Java 11 installation as described here, and the wiring with a LED and button described here in my previous blog posts.
Running the application
After running the Maven > Lifecycle > Package command in my IDE a .jar-file is created of +-26Mb. This file is copied to the Pi and can be started with the following command:
pi@raspberrypi:~ $ /opt/jdk-11.0.2/bin/java -jar /home/pi/pi4j/pi4j-service-2.0-SNAPSHOT.jar

  .   ____          _            __ _ _
 /\\ / ___'_ __ _ _(_)_ __  __ _ \ \ \ \
( ( )\___ | '_ | '_| | '_ \/ _` | \ \ \ \
 \\/  ___)| |_)| | | | | || (_| |  ) ) ) )
  '  |____| .__|_| |_|_| |_\__, | / / / /
 =========|_|==============|___/=/_/_/_/
 :: Spring Boot ::        (v2.1.3.RELEASE)

2019-05-23 19:55:47.391  INFO 3111 --- [           main] com.pi4j.service.ServiceApplication      : Starting ServiceApplication on raspberrypi with PID 3111 (/home/pi/pi4j/pi4j-service-2.0-SNAPSHOT.jar started by pi in /home/pi)
2019-05-23 19:55:47.413  INFO 3111 --- [           main] com.pi4j.service.ServiceApplication      : No active profile set, falling back to default profiles: default
2019-05-23 19:55:59.386  INFO 3111 --- [           main] o.s.b.w.embedded.tomcat.TomcatWebServer  : Tomcat initialized with port(s): 8080 (http)
2019-05-23 19:55:59.709  INFO 3111 --- [           main] o.apache.catalina.core.StandardService   : Starting service [Tomcat]
2019-05-23 19:55:59.711  INFO 3111 --- [           main] org.apache.catalina.core.StandardEngine  : Starting Servlet engine: [Apache Tomcat/9.0.16]
2019-05-23 19:55:59.780  INFO 3111 --- [           main] o.a.catalina.core.AprLifecycleListener   : The APR based Apache Tomcat Native library which allows optimal performance in production environments was not found on the java.library.path: [/usr/java/packages/lib:/lib:/usr/lib]
2019-05-23 19:56:00.288  INFO 3111 --- [           main] o.a.c.c.C.[Tomcat].[localhost].[/]       : Initializing Spring embedded WebApplicationContext
2019-05-23 19:56:00.289  INFO 3111 --- [           main] o.s.web.context.ContextLoader            : Root WebApplicationContext: initialization completed in 12478 ms
2019-05-23 19:56:03.898  INFO 3111 --- [           main] pertySourcedRequestMappingHandlerMapping : Mapped URL path [/v2/api-docs] onto method [public org.springframework.http.ResponseEntity <springfox.documentation.spring.web.json.json>springfox.documentation.swagger2.web.Swagger2Controller.getDocumentation(java.lang.String,javax.servlet.http.HttpServletRequest)]
2019-05-23 19:56:05.211  INFO 3111 --- [           main] o.s.s.concurrent.ThreadPoolTaskExecutor  : Initializing ExecutorService 'applicationTaskExecutor'
2019-05-23 19:56:07.177  INFO 3111 --- [           main] d.s.w.p.DocumentationPluginsBootstrapper : Context refreshed
2019-05-23 19:56:07.381  INFO 3111 --- [           main] d.s.w.p.DocumentationPluginsBootstrapper : Found 1 custom documentation plugin(s)
2019-05-23 19:56:07.599  INFO 3111 --- [           main] s.d.s.w.s.ApiListingReferenceScanner     : Scanning for api listing references
2019-05-23 19:56:09.628  INFO 3111 --- [           main] o.s.b.w.embedded.tomcat.TomcatWebServer  : Tomcat started on port(s): 8080 (http) with context path ''
2019-05-23 19:56:09.652  INFO 3111 --- [           main] com.pi4j.service.ServiceApplication      : Started ServiceApplication in 25.579 seconds (JVM running for 28.851)
2019-05-23 19:56:09.663  INFO 3111 --- [           main] com.pi4j.service.ServiceApplication      : =============================================
2019-05-23 19:56:09.664  INFO 3111 --- [           main] com.pi4j.service.ServiceApplication      : Spring boot Pi4J service application started.
2019-05-23 19:56:09.664  INFO 3111 --- [           main] com.pi4j.service.ServiceApplication      : =============================================
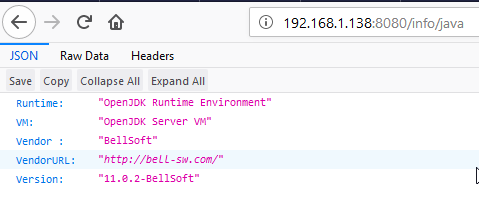
When the application has started, the Java info can be requested from the url http://{IP-OF-YOUR-PI}:8080/info/java
Conclusion
Fun! That’s the feeling after experimenting with Spring and Pi4J to get this thing working. I hope this can be further extended/integrated in Pi4J.
Adding websockets for more immediate data exchange and handling of interrupts would also be a great thing, but that’s for a next experiment… ;-)